
In this guide, you’ll make a working map with a background and a few interactive points. You’ll then open the viewer preview to see what your visitors will see.
You can complete these steps during your free trial. You can preview your map during the trial, but you’ll need a paid project to publish it.
Have an image ready to use as your background, such as a site plan, masterplan, floor plan or aerial image.
It also helps to have the names and availability of a few items you want to show. These might be lots, apartments, berths or another type of location. You can start with just one item and add the rest later.
Create a project
On the Projects screen, select Create project.
Enter your Project name.
Select Create project.
Your new project opens on the Map tab.

Add a background
Your background is the image people will explore. You’ll place interactive points over it in a later step.
On the Map tab, find Add your first background.
Under Upload image or GLB, select Choose File.
Choose your image and wait for it to appear on the map.
Start with one image for this guide. Once it appears, you can scroll to zoom and right-drag to move around it while editing.

Create your first point
A point is an interactive item on your map. For example, a point could represent a lot, apartment, berth or storage unit.
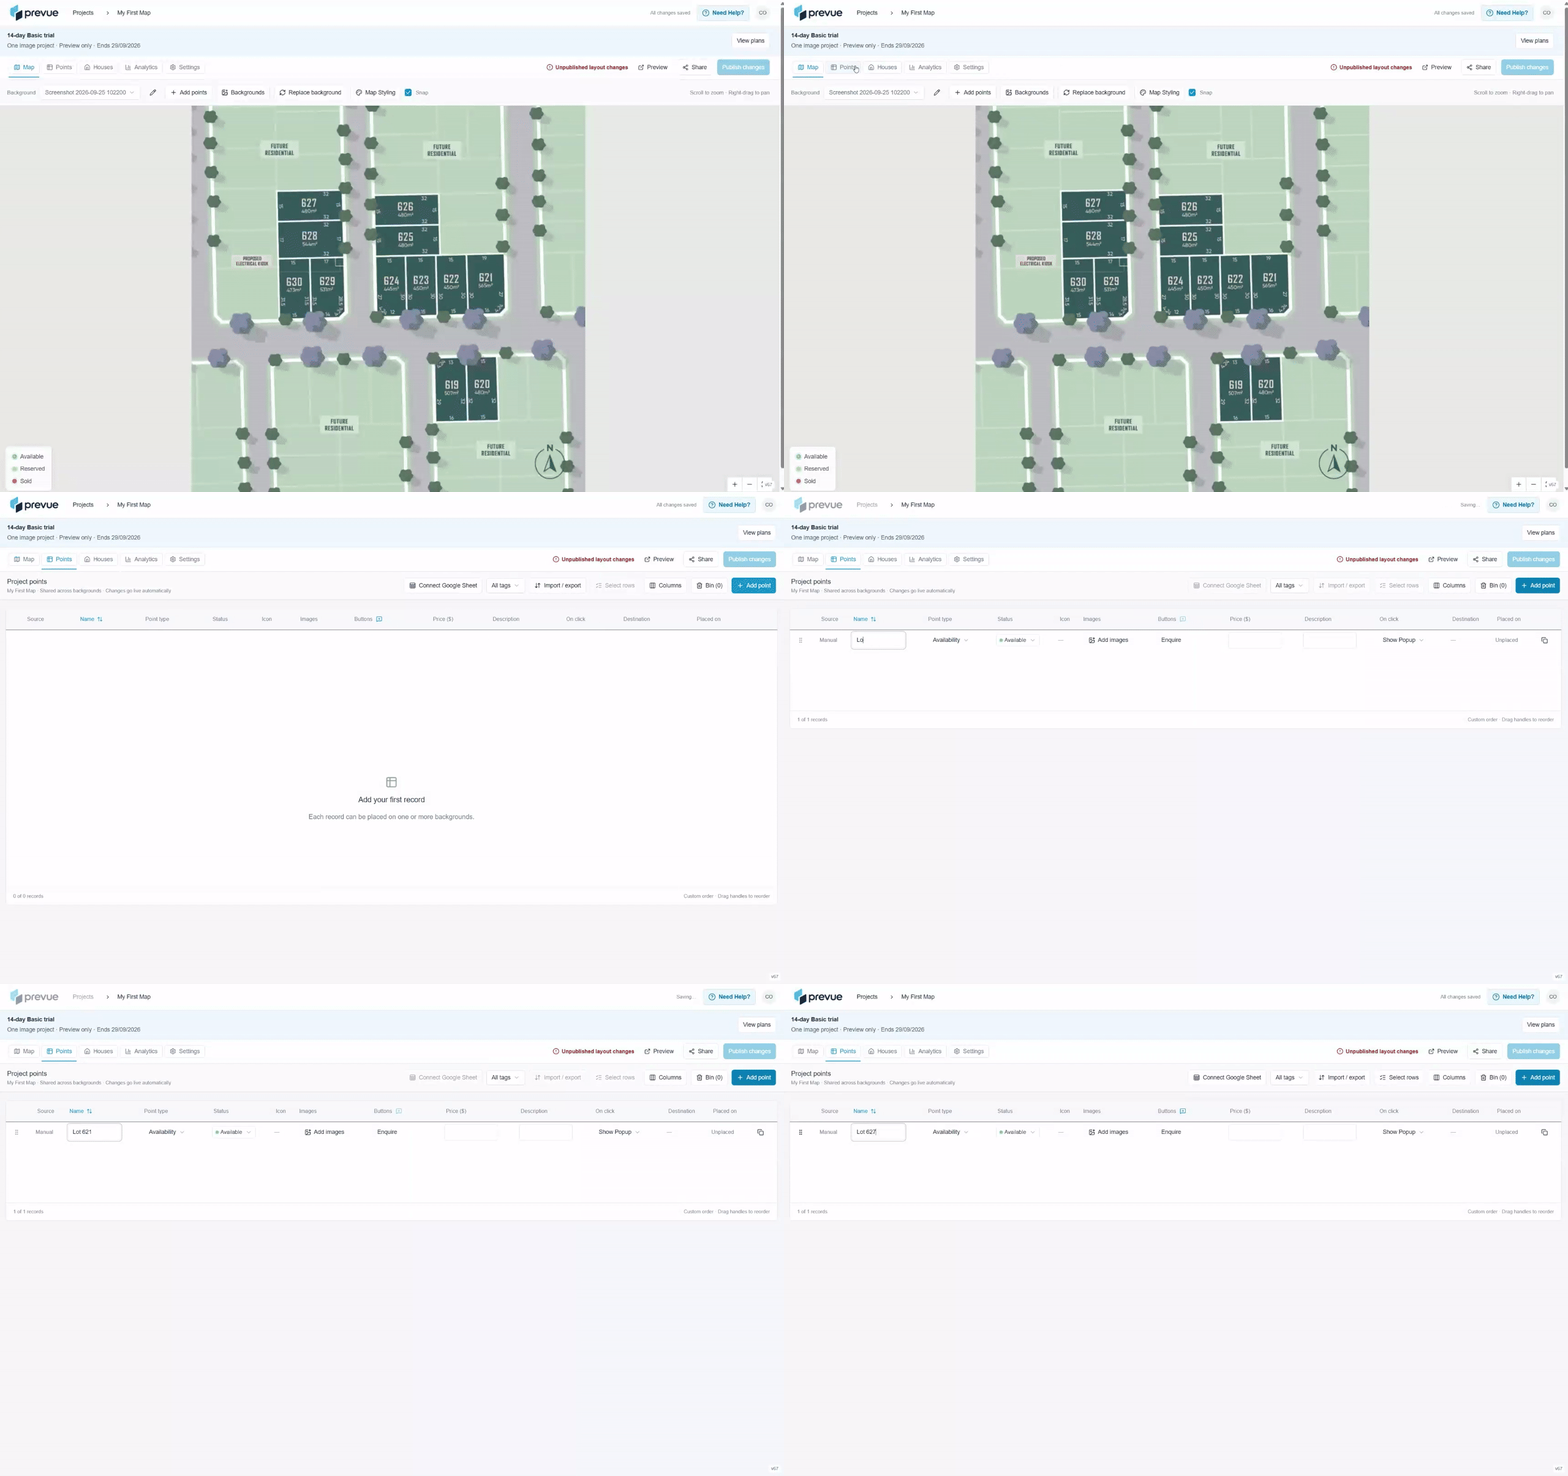
Open the Points tab.
Select Add point.
In the Name column, replace New point with a clear name, such as Lot 627.
Choose its Status, such as Available, Reserved or Sold.
Add a Description, Price or images if you have them ready.
For a useful first preview, we recommend adding at least a short description or an image. If you leave those fields empty, the popup can still show the point’s name, status and Enquire button, but it won’t give visitors much more to explore.
The Placed on column will say Unplaced until you put the point on your background.
Add a few more points
Select Add point for each additional item. Give every point a distinct name and check that its status is correct.
Three or four points are enough to test your first map. You can return to Points to add more details later.

Place your points on the map
Return to the Map tab.
Select Add points.
In the panel on the left, find the point you want to place.
Drag its record onto the correct location on the background. You can also select the record, then click where it belongs.
Repeat for the other points.
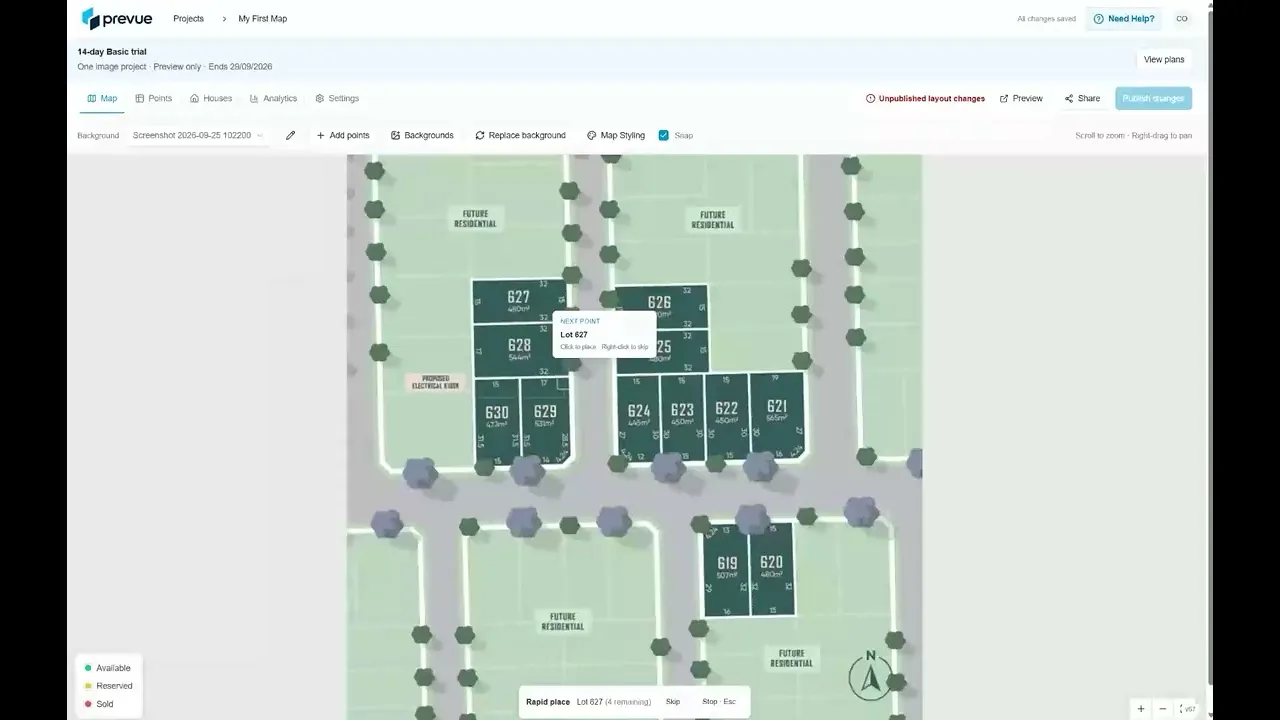
If you have several unplaced points, select Rapid place points to place them in table order. Prevue shows the name of the next point; click its location on the map to place it. Use Skip if you’re unsure where a point belongs. Skipped points remain unplaced so you can return to them later.
Before moving on, check that each marker sits on the correct item in your image.

Preview the visitor experience
Select Preview near the top right of your project. This opens the Draft viewer preview without publishing the map.
Try the map as a visitor would:
Check that the background opens at a useful size.
Confirm that every marker is in the right place.
Select each marker and read its popup.
Check names, statuses, descriptions, prices and images where you added them.
Try the zoom controls and Search & filter.
If anything needs changing, close the preview. Edit the record under Points, or adjust its position under Map, then preview again.

Your first map is ready to refine
You’ve created a project, added a background, placed interactive points and checked the visitor preview. You can now add more records, improve the point details and adjust the map’s appearance before publishing.
Saving and publishing: Look for All changes saved to confirm your edits have been stored.
If you see Unpublished layout changes, the map layout has changes that have not been published to an existing live viewer. Preview lets you check the draft before publishing.
The Points tab indicates that point data changes go live automatically on an already published project, so check edits to live records carefully.
Still need a hand? Contact support